


The SDK is distributed as VirtualBox images, with one VirtualBox image for each version of Apertis. As the SDK is designed to be used for development, it is highly likely that developers using it will adjust the SDK to their needs. These changes include installing tools, libraries, changing system configuration files, and adding content to their workspace. Additionally some developers may have to support different versions of the SDK at the same time and it may be advantageous for them to be able to synchronize their customizations between multiple SDK VirtualBox images. Migrating such customizations is time consuming and involves frustrating and repetitive work.
Whilst the use of VirtualBox shared folders would seem to be an ideal solution here, given that the setup would be simple while also allowing the developer to easily share data to and between SDKs. However, shared folders don’t support the creation of symlinks, which is essential for development given that they are frequently used when configuring a source tree to build.
The SDK includes a tool named psdk to help developers to migrate their data when upgrading to a newer version of the SDK. The basic idea is to use a second and persistent disk to store:
- /home
- /opt
- /etc/cntlm.conf
- Other configuration files selected by the developer
The use of a persistent workspace is optional. Check if you need persistent workspace before following these steps.
For advanced options including sharing the persistent disk between SDKs simultaneously, please see the README for the complete documentation of psdk.
It is recommended to make a backup copy of your SDK before continuing.
Upgrading to a new SDK using a persistent disk
This involves two different SDK virtual machines: the old SDK and the new SDK. The suggested use is to first initialize the persistent disk on the old SDK, and then use the persistent disk on the new SDK.
VirtualBox: Adding the persistent disk to the old SDK
Start by adding a second disk to the old SDK on VirtualBox. This disk should be big enough to host the contents of /home and /opt: we recommend using more than 40GiB and no less than 20GiB. We suggest using dynamically allocated VDI images so that the unused space does not consume disk space on the host.
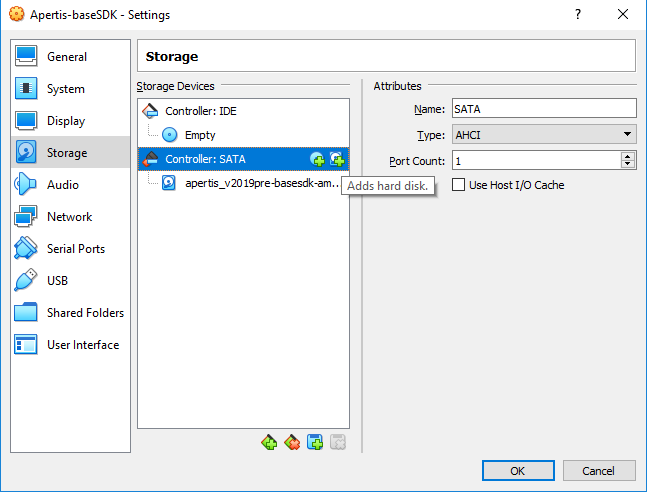
Open the Settings window of the old SDK, click on the Storage tab, select Controller SATA, and click on the icon Adds hard disk:
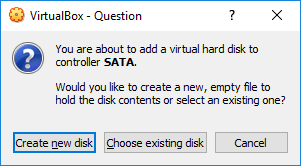
Choose Create new disk:
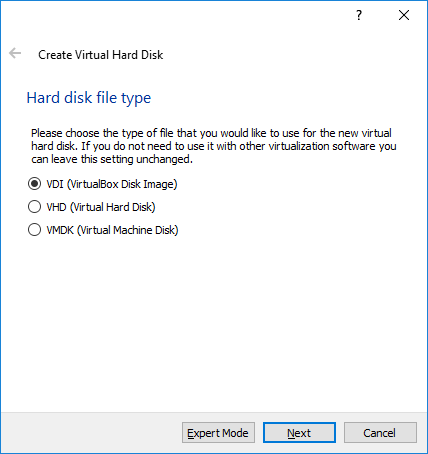
Choose VDI (VirtualBox Disk Image) and click Next:
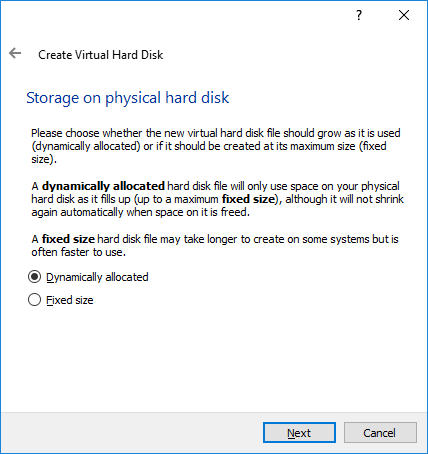
Choose Dynamically allocated and click Next:
Choose a folder to store the disk, a file name, and the size of the disk. Then click on create:

Preparing the persistent disk on the old SDK
psdk is installed by default on base SDK and on SDK images since Apertis v2019pre. The psdk package is also available on Apertis package repositories. If you want to install psdk on an older SDK, you can try installing the Debian package directly or install from the source code. At the time of writing psdk required the following packages to be installed: python3, zenity
After adding the second disk, start the old SDK and click on the psdk icon: Applications -> System -> Persistent Disk Setup.
![]()
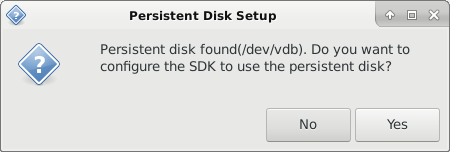
psdk will open in interactive mode, and will guide you trough the processes of initializing the new disk and configuring the SDK to use it. Do not worry if the Linux device node(/dev/vdb) is different for you.
![]()
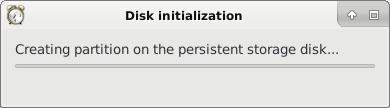
psdk will show progress while initializing the disk.
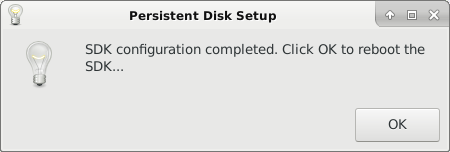
After psdk is done, it will ask you to reboot the SDK. Click OK, wait for the reboot to complete.

After the reboot completes turn off the old SDK.
VirtualBox: Adding the persistent disk to the new SDK
Configure the persistent disk on the new SDK before adding or changing
files on the new SDK. Changes made to /home/user, /opt, and to
/etc/cntlm.conf before configuring the persistent disk will be overwritten by
the persistent disk. See the
README
for more details.
Open the Settings window of the new SDK, click on the Storage tab, select Controller SATA, and click on the icon Adds hard disk:
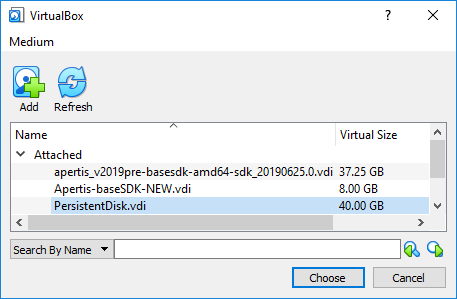
Click on Choose existing disk:

The persistent disk will be under the category Attached. Select the persistent disk, and click on Choose:
Using the persistent disk on the new SDK
The final step is to call psdk from the new SDK. Start the new SDK and click on the psdk icon: Applications -> System -> Persistent Disk Setup.
![]()
psdk will open in interactive mode, and will guide you trough the processes of configuring the new SDK to use the persistent disk. Do not worry if the Linux device node(/dev/vdb) is different for you.
This will be much faster than initializing the disk. After psdk is done, it will ask you to reboot the SDK. Click OK, and wait for the reboot to complete.
The persistent disk is now setup and ready for use.