


Table of Contents:
This is the setup recommended for developers using the Sabrelite directly. See SABRE Lite LAVA setup for setting up devices for use in LAVA.
Required items
You should have at least:
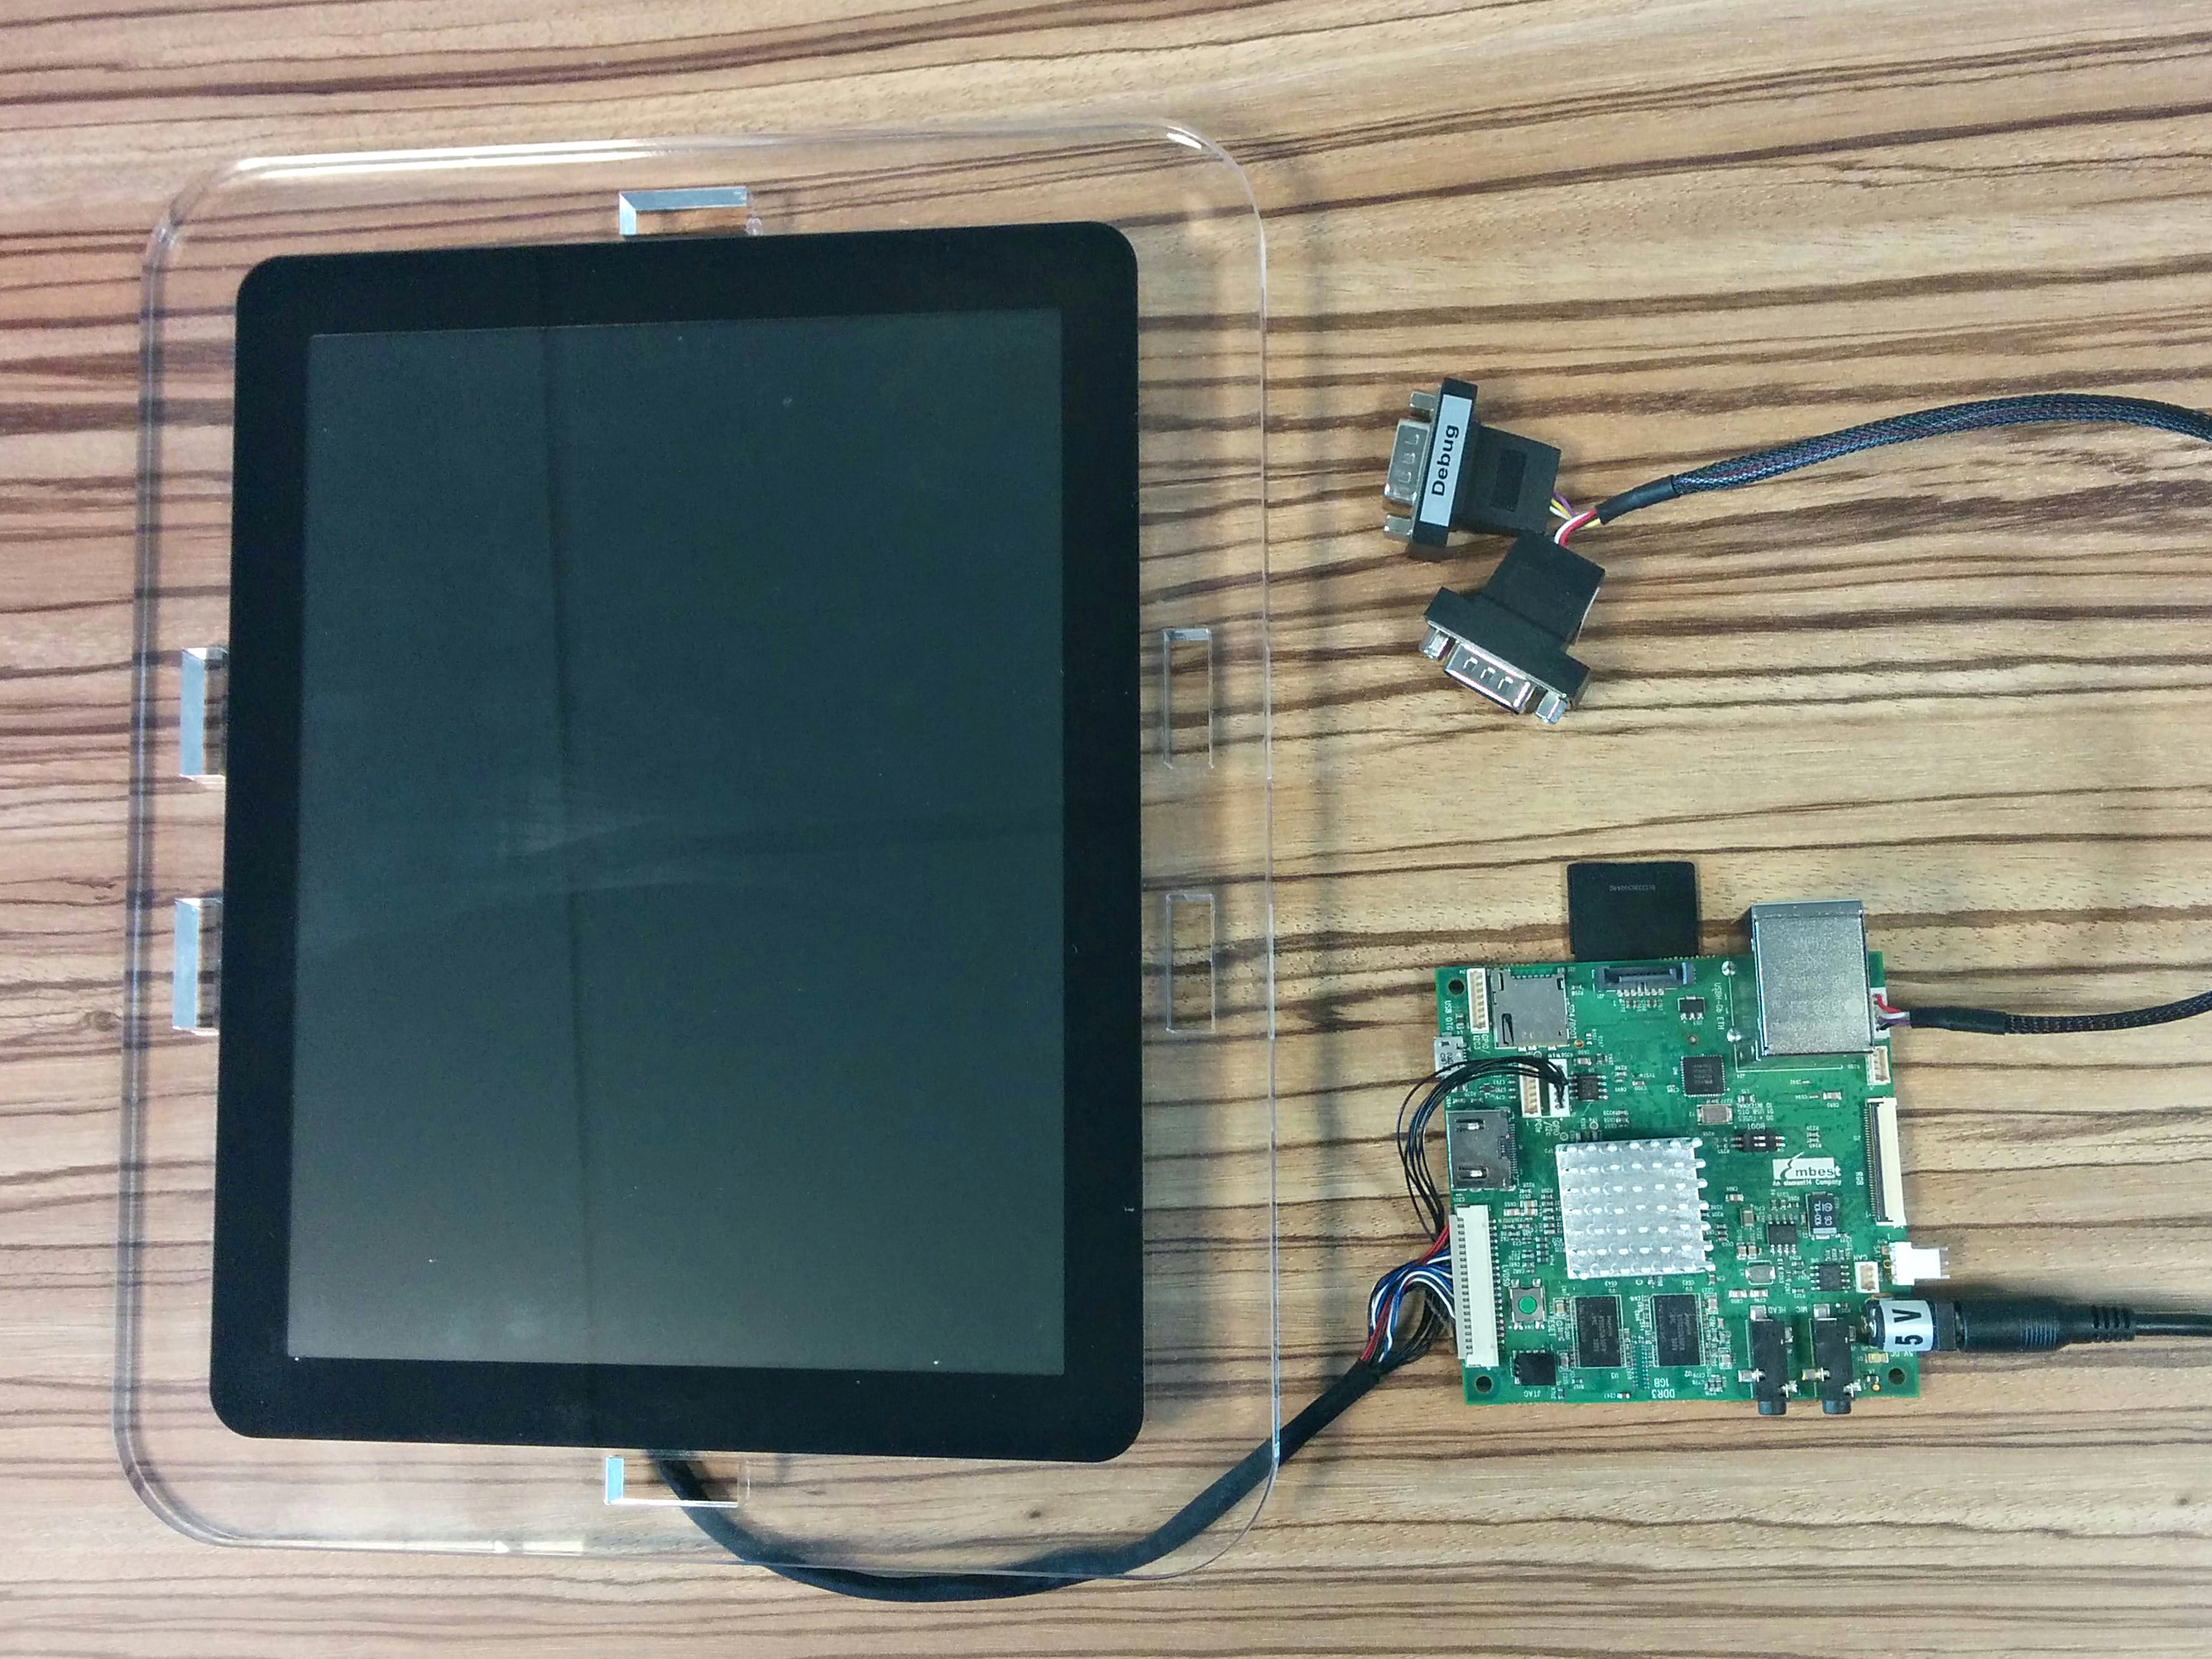
- 1 SABRE Lite board
- 1 Power adaptor
- 1 USB to serial cable (RS232 line voltages)
- 1 SD card, with adapter if MicroSD card used (at least 8GB)
SABRE Lite board setup
Apertis provides its own build of U-Boot for the SABRE Lite that it expects to be flashed into the NOR Flash on SPI. This is preferred over storing U-Boot on the SD card as it allows a common Apertis image to be programmed onto the SD card.
- Download and program the SABRE Lite installer (called
uboot-<version>-installer-mx6qsabrelite.img.gzto the SD card. Images can be found under theinstallerdirectory of the relevant release on the Apertis image download site. - Insert the SD card into the full SD card slot on the rear of the board,
labelled
SD3not the MicroSD card slot on the front labelledSD4/BOOT. - Attach the serial breakout cable to the SABRE Lite and connect the DB9
connector labelled
CONSOLEto the USB to serial cable. - Ensure the
SW1switches are in the following positions (invert switch positions for v1.0 board):
| Switch | Position | 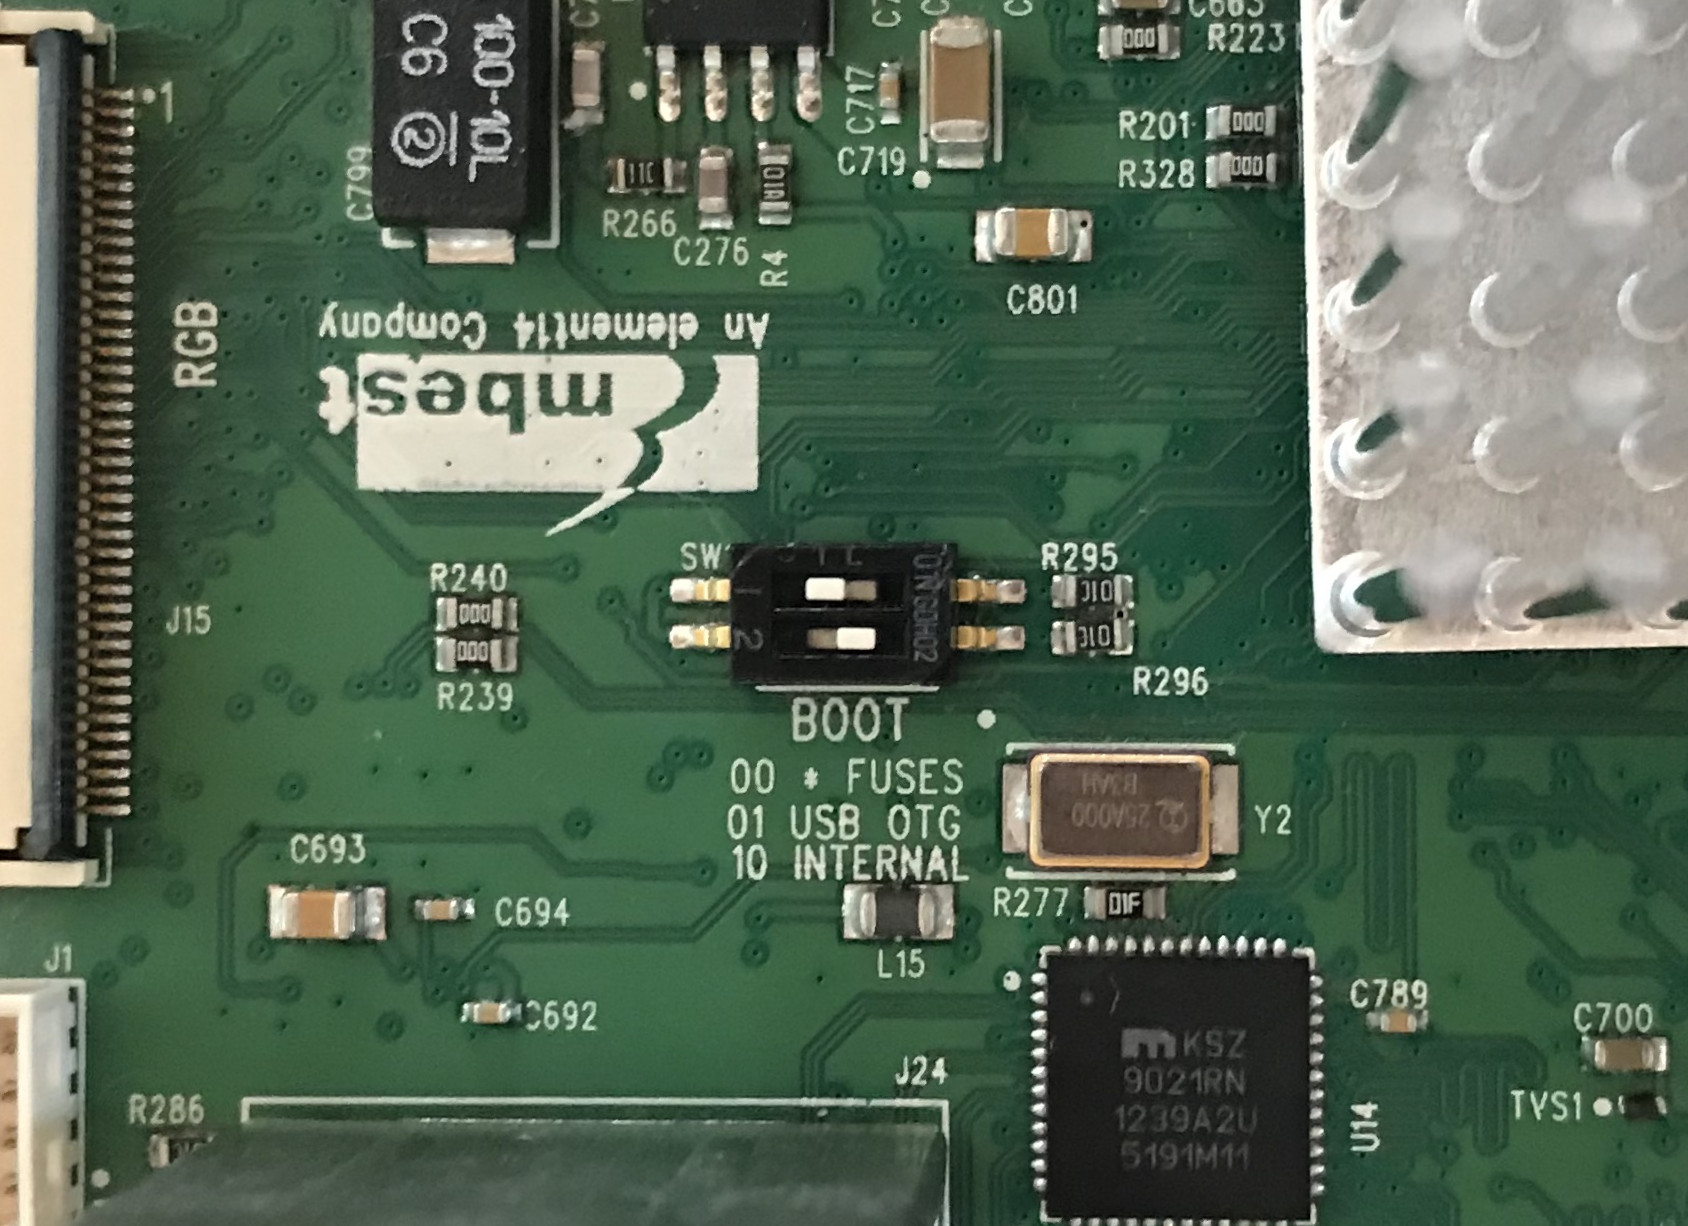 |
| SW1.1 | 1 | |
| SW1.2 | 0 |
- Power up the SABRE Lite.
- Once the SABRE Lite has finished programming, the following message will be displayed:
+-----------------------------------------------------------------+
|                  U-Boot installation complete                   |
|                                                                 |
| Please remove the SD Card and power cycle the board to continue |
+-----------------------------------------------------------------+
- Remove the SD card and power off the board.
- Download and program the required image onto the SD card.
- Insert the SD card into the into the full SD card slot on the rear of the
board, labelled
SD3not the MicroSD card slot on the front labelledSD4/BOOT. - Power up the SABRE Lite.
Flash the SABRE Lite NOR if SD card not booting
If the SD card procedure above is not working, it may be that the NOR Flash is not in the required state. We can recover from this situation by booting via USB-OTG.
In addition to the items outlined in the “Required items” section you will need a USB to microUSB cable.
- Monitor the serial console of the SABRE Lite using a dedicated terminal emulator. Do not close this terminal to be able to detect if flashing process works as described.
- In an additional terminal download and build the imx loader:
$ sudo apt install -y build-essential libusb-1.0-0 libusb-1.0-0-dev
$ git clone https://github.com/boundarydevices/imx_usb_loader.git
$ cd imx_usb_loader
$ make
- Ensure the SABRE Lite is powered down.
- Attach the microUSB cable to the
USB OTGport and the other to your host. If using a development environment inside of VirtualBox, please ensure the USB-OTG device is accessible from the VirtualBox virtual machine. - Ensure the
SW1switches are in the following positions (invert switch positions for v1.0 board):
| Switch | Position |  |
| SW1.1 | 0 | |
| SW1.2 | 1 |
- Download and program the SABRE Lite installer (called
uboot--installer-mx6qsabrelite.img.gzto the SD card. Images can be found under theinstallerdirectory of the relevant release on the Apertis image download site. - Mount the
datapartition on the SD card and retrieve theu-boot.imxfile fromdeb-binaries/usr/lib/u-boot/mx6qsabrelite/and copy to the folder where the imx loader was cloned. - Unmount the SD card and insert the SD card into the full SD card slot on the
rear of the board, labelled
SD3not the MicroSD card slot on the front labelledSD4/BOOT. - Power up the board.
- The following USB device should show as being attached to your host:
$ lsusb -d15a2:0054
Bus 002 Device 048: ID 15a2:0054 Freescale Semiconductor, Inc. i.MX 6Dual/6Quad SystemOnChip in RecoveryMode
- From the location where imx loader was cloned and built, run the following command:
$ sudo ./imx_usb ./u-boot.imx
- Board should boot U-Boot and program the flash using the image on the SD card.
- This step is needed ONLY in case if you see the U-Boot prompt
=>on terminal attached to serial console, usually it happens if you flash different U-Boot version. You have to reset default environment and start the boot process:
env default -a
saveenv
run bootcmd
- Once the SABRE Lite has finished programming, the following message will be displayed on terminal attached to serial console:
+-----------------------------------------------------------------+
|                  U-Boot installation complete                   |
|                                                                 |
| Please remove the SD Card and power cycle the board to continue |
+-----------------------------------------------------------------+
- Remove the SD card and power down the board.
- Ensure the
SW1switches are returned to the following positions to allow normal booting (invert switch positions for v1.0 board):
| Switch | Position | |
| SW1.1 | 1 | |
| SW1.2 | 0 |
Known issues
VirtualBox setup for USB-OTG
In USB-OTG mode SABRE Lite creates additional device for booting via USB named Freescale SemiConductor Inc SE Blank.
This device must be attached to virtual machine with Apertis SDK as shown on screenshot below:
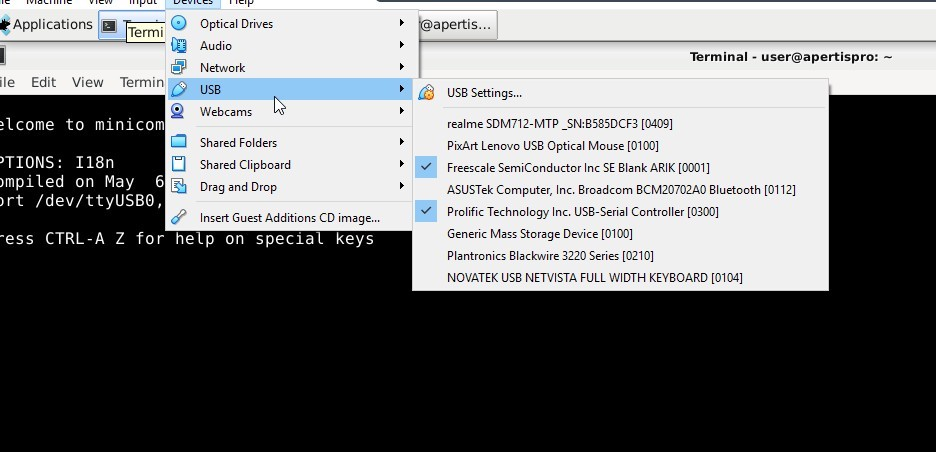
To check if the device is detected properly by Apertis SDK VM run the command below:
$ sudo lsusb -d15a2:0054
Bus 002 Device 008: ID 15a2:0054 Freescale Semiconductor, Inc. i.MX 6Dual/6Quad SystemOnChip in RecoveryMode
Gigabit networks
The i.MX6 internal bus is too slow for full speed 1Gbps traffic, to avoid congestion and dropped frames the kernel tells the hardware to send “pause” frames if switches say that they support them to slow down the flow.
Unfortunately some switches say that they support pause frames but get badly confused by them, causing severe packet loss.
The best workaround is to buy an inexpensive 100Mbps switch and interpose it between the device and the affected 1000Mbps switch to force the i.MX6 connection to a slower but safe speed.