


Table of Contents:
The recommended virtual machine platform for the AMD64 Apertis system images is VirtualBox. It is typical for the Apertis SDK to be run in a virtual machine, though other image types can also be used. This enables development to be performed on computers running Windows, Mac OS, or different Linux distributions.
System requirements
You will need a PC with the following configuration to install and run the SDK:
Hardware
- Dual core CPU at 2GHz or higher
- 8 GB RAM or more
- 12 GB or more free space on the hard disk
If your PC supports Virtualization Technology, make sure that it is enabled. If problems are seen when booting the SDK image, check if Virtualization Technology is enabled in BIOS settings.
Software
- Windows OS
- Oracle VirtualBox. See supported version and installation instructions below.
VirtualBox supported version
While you can use VirtualBox in other environments, and even use other virtualization solutions, the supported setup is to run VirtualBox on Microsoft Windows.
The following table contains the supported version of VirtualBox and VirtualBox Guest additions for each release of Apertis:
| Apertis release | VirtualBox version | VirtualBox Guest Additions version |
|---|---|---|
| v2019 | 6.1.12 r139181 (Qt5.6.2) | 6.1.12 |
| v2020 | 6.1.12 r139181 (Qt5.6.2) | 6.1.12 |
| v2021 | 6.1.12 r139181 (Qt5.6.2) | 6.1.12 |
| v2022 | 6.1.12 r139181 (Qt5.6.2) | 6.1.12 |
Installing VirtualBox
If you have not yet installed Oracle VM VirtualBox, to install the current version of this software, please follow these steps:
-
Download the required version of the VirtualBox installation file for your host platform. Check the table of supported versions above to determine which version of VirtualBox is supported for the Apertis Release you want to use.
-
Follow the installation procedure provided in the VirtualBox installation guide for your host plaform.
For instructions on uninstalling VirtualBox, are also provided in the user manual.
VirtualBox Setup
VirtualBox can be configured as follows:
- option A: from its GUI
- option B: via the command line
Option A: From the VirtualBox GUI
-
If you have not already downloaded an Apertis SDK image, the images page contains information regarding the options available. SDK images provided explicitly for use with VirtualBox have the file extension
.vdi.gz. -
Extract the gzipped VDI image file to a local folder on your PC. The image for the virtual machine is a single file.
-
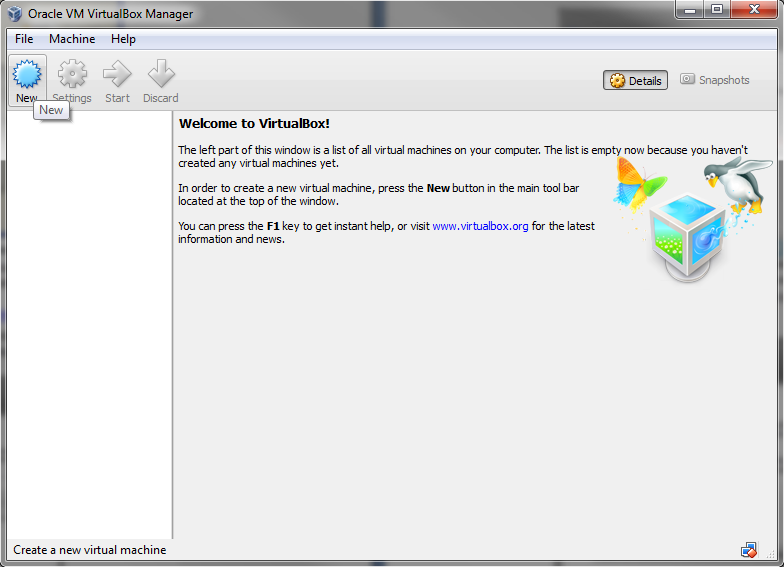
Start the VirtualBox application (“Oracle VM VirtualBox” in the Start menu).
-
Go to
Machine▸Newor click the New Icon. This launches the Create New Virtual Machine screen. -
Enter a name and select type and version from the menus:
-
Name: recommendation is to use the format
Apertis $RELEASE.$REVISION SDKe.g.Apertis v2020.0 SDK -
Type:
Linux -
Version:
Debian (64 bit)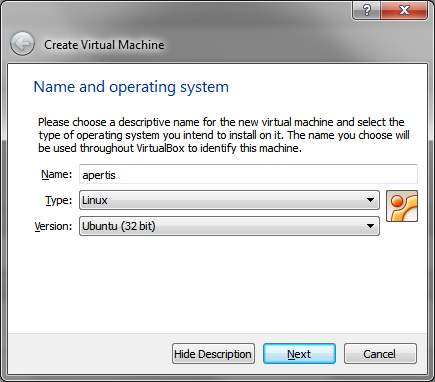
-
-
Select the RAM size. Change the values manually according to your requirements. Assign at least 50% RAM for the virtual machine if your total RAM is more than 2 GB, with 2048MB recommended as the minimum for the SDK.
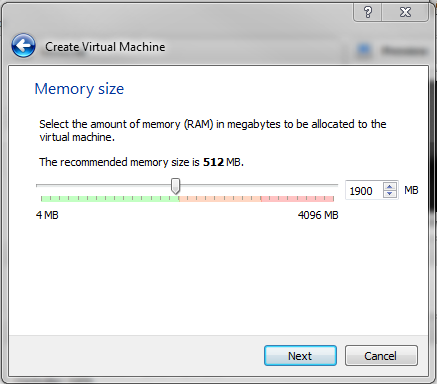
Not enough RAM might cause problems while you use the SDK (for example, Eclipse might crash).
-
Select Use an existing virtual hard drive file and browse to the location of your unzipped file (which should have the extension
.vdi).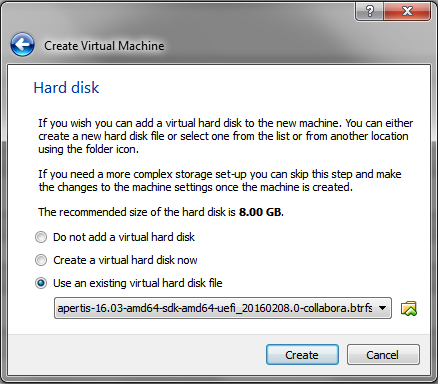
-
Click Create to create the virtual machine.
-
A few more settings need to be modified to ensure that the Apertis images boot. Select your new virtual machine and select
Settings....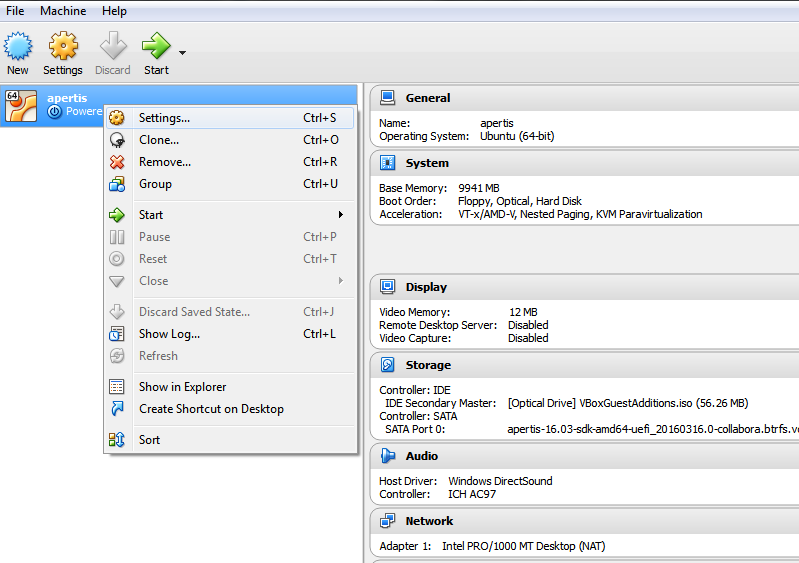
-
Ensure that the following settings are set as required:
-
Check the
System▸Motherboard▸Enable EFI (special OSes only)option -
Check the
System▸Processor▸Enable PAE/NXoption -
Set video memory,
Display▸Screen▸Video Memory, 64MB is recommended -
Be sure 3D Acceleration is disabled. Ensure
Display▸Screen▸Enable 3D Accelerationis unchecked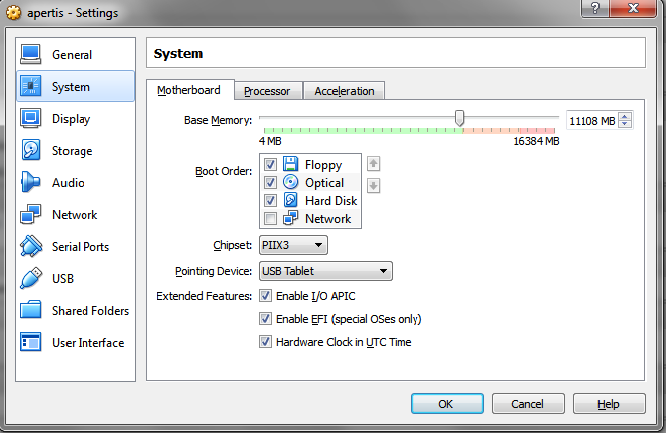
-
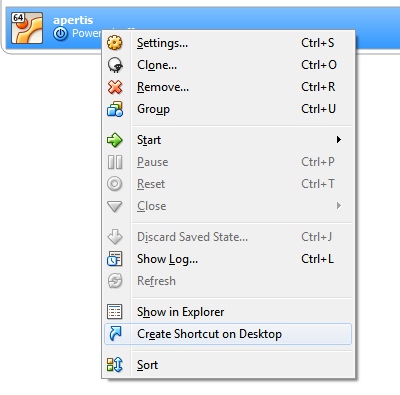
-
If you want to start your virtual machine from the desktop without having to open the VirtualBox every time, you can create a desktop icon. Right-click the entry of your virtual machine on the left and choose Create Shortcut on Desktop from the menu.
If you would like additional information about creating a new virtual machine you can find it in the VirtualBox manual
Option B: From the Command Line
- Run the following commands:
$ RELEASE=v2020
$ REVISION=0
$ wget https://images.apertis.org/release/$RELEASE/$RELEASE.$REVISION/amd64/sdk/apertis_$RELEASE-sdk-amd64-sdk_$RELEASE.$REVISION.vdi.gz
--2020-06-09 16:20:04--  https://images.apertis.org/release/v2020/v2020.0/amd64/sdk/apertis_v2020-sdk-amd64-sdk_v2020.0.vdi.gz
Resolving images.apertis.org (images.apertis.org)... 2a00:1098:0:82:1000:25:2eeb:e3bc, 46.235.227.188
Connecting to images.apertis.org (images.apertis.org)|2a00:1098:0:82:1000:25:2eeb:e3bc|:443... connected.
HTTP request sent, awaiting response... 200 OK
Length: 2363044547 (2.2G) [application/octet-stream]
Saving to: ‘apertis_v2020-sdk-amd64-sdk_v2020.0.vdi.gz’

apertis_v2020-sdk-a 100%[===================>]   2.20G  6.10MB/s    in 5m 57s

2020-06-09 16:26:01 (6.32 MB/s) - ‘apertis_v2020-sdk-amd64-sdk_v2020.0.vdi.gz’ saved [2363044547/2363044547]

$ gunzip apertis_$RELEASE-sdk-amd64-sdk_$RELEASE.$REVISION.vdi.gz
$ VDIFILE=./apertis_$RELEASE-sdk-amd64-sdk_$RELEASE.$REVISION.vdi
$ VMNAME="Apertis $RELEASE.$REVISION SDK"
$ vboxmanage createvm --register --name "$VMNAME" --ostype Debian_64
Virtual machine 'Apertis v2020.0 SDK' is created and registered.
UUID: 6370548c-2a11-4fb8-9411-5dc2ae686a8f
Settings file: '/home/user/VirtualBox VMs/Apertis v2020.0 SDK/Apertis v2020.0 SDK.vbox'
$ vboxmanage modifyvm "$VMNAME" --memory 2048 --apic on --pae on --largepages off --firmware efi --accelerate3d off --vram 64
$ vboxmanage modifyvm "$VMNAME" --nictype1 virtio
$ vboxmanage storagectl "$VMNAME" --name SATA --add sata
$ vboxmanage storageattach "$VMNAME" --storagectl SATA --port 0 --type hdd --medium "$VDIFILE"
$ vboxmanage storageattach "$VMNAME" --storagectl SATA --port 1 --type dvddrive --medium emptydrive
$ vboxsdl --startvm "$VMNAME"
Oracle VM VirtualBox SDL GUI version 6.0.22
(C) 2005-2020 Oracle Corporation
All rights reserved.
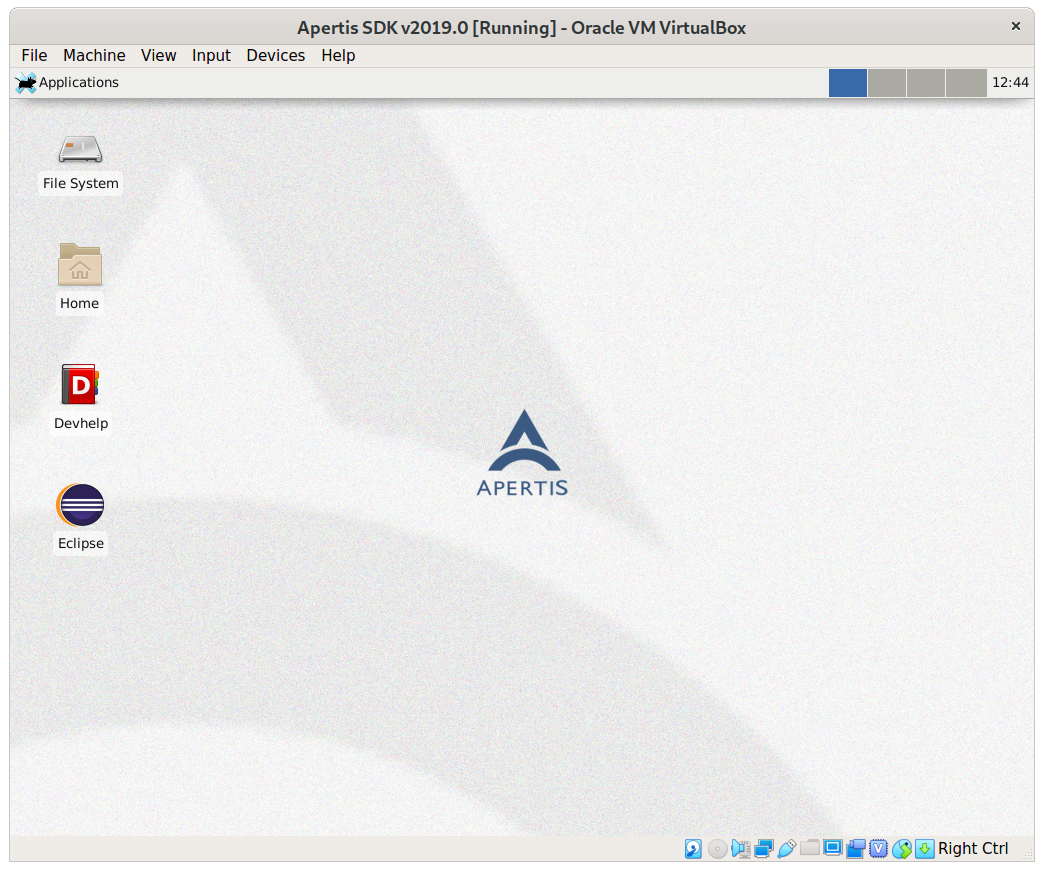
Start the virtual machine for the first time
Use your just created desktop shortcut, or click Start in VirtualBox to start the virtual machine. The boot-up-process might take a few seconds.
On starting the virtual machine, VirtualBox might display some popup windows informing you about mouse, keyboard and color settings which might be different on the VM. Please read through the messages and click OK for all of them. If you check the Do not show this message again checkbox, you can permanently disable these popup messages for this virtual machine.
The VirtualBox manual provides more information on the mouse and keyboard settings.
Guest Additions under VirtualBox SDK images
Guest additions consist of device drivers and system applications that optimize the guest operating system for better performance and usability. They are designed to be installed inside a virtual machine after the guest operating system has been installed. For more information on the features provided by guest additions, see the VirtualBox manual.
In the context of the Apertis project, guest additions allow developers to enable full screen rendering within VirtualBox SDK images. Full screen is not the only reason to install guest additions, though. Shared folders are another very handy feature.
Before starting installation of the Guest Additions it might be helpful to adapt the keyboard layout.
Installation
It is necessary to install guest additions corresponding to the virtual box version installed.
Make sure to backup any important data you may have in your virtual machine before installing Guest Addtions. Some revisions of the Guest Additions have been known to cause issues with the Apertis SDK images.
- Start your VirtualBox Apertis machine SDK image
- Go to
Devices▸Insert Guest Additions CD Image…on the VirtualBox menu bar. A virtual device will appear on the desktop.

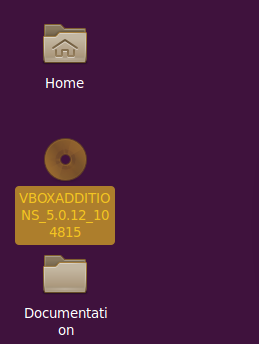
-
Double-click on the
VBOXADDITIONSCD icon which should appear on your guest desktop. This will launch a file browser. -
Open a terminal by right click ▸
open terminalin the guest additions folder -
Run the Linux Guest Additions installation script:
$ sudo ./VBoxLinuxAdditions.run
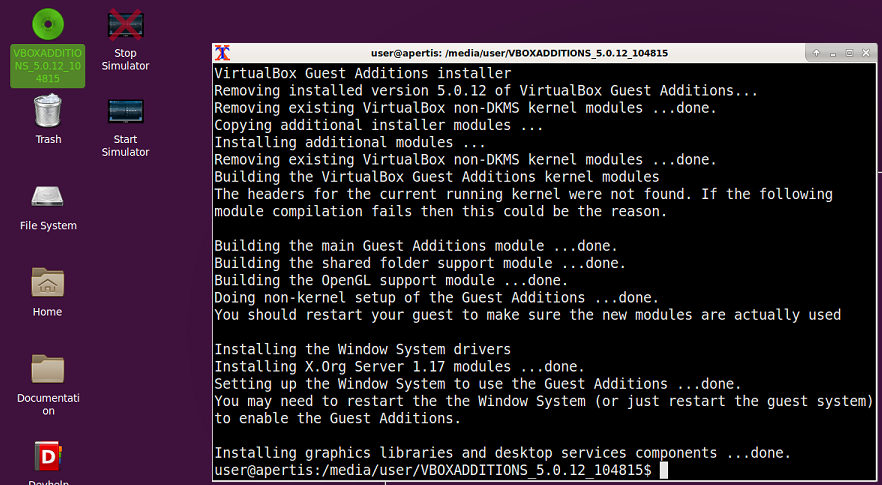
- Reboot your virtual machine
- Verify a new directory is created under
/optwith guest additions or verify thevboxguestmodule is loaded
You can now enjoy guest additions' enhanced features.
Once the Guest Additions are installed successfully (the process might take a few minutes), restart the virtual machine, see here if you need help with that.
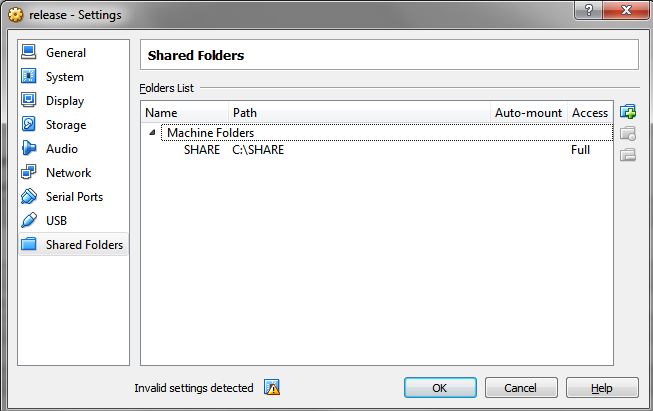
Setting up shared folders
Go to Settings and click Shared Folders and select Add Shared
Folders (use the icon on the left hand side). Browse to the path you created
your share folder in (e.g. C:\SHARE). Click OK and close the Settings
window. The VirtualBox VM Settings can only be edited when the VM is closed. So
please close all VMs if any should be running, before setting up a shared
folder.
Once you start the virtual machine, go to ApplicationsTerminal Emulator and run this command in the terminal:
$ sudo mount –t vboxsf HOST_DIR_NAME GUEST_DIR_NAME
E.g:
$ sudo mount –t vboxsf SHARE /mnt
This command will mount the share folder to the current /mnt.
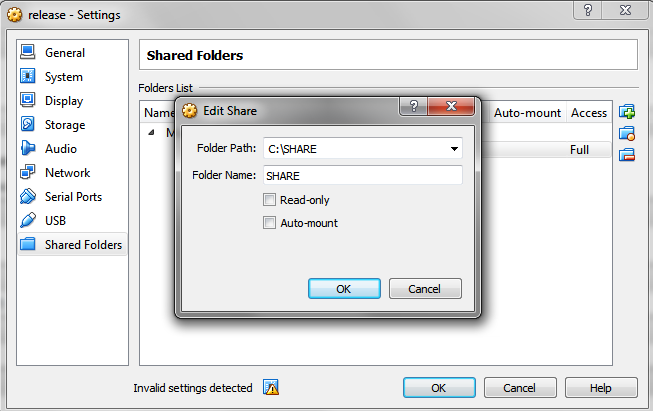
Beside the manual mounting of the shared folder it is possible to enable the automatic mounting.
Please set a tick mark for the Auto-mount option and provide a mount path e.g. /mnt/vmshare.
In order to access the mount path with user access rights you have to call
$ sudo usermod -a -G vboxsf "$USER"
and reboot your virtual machine afterwards. See also the VirtualBox manual.
Setting up shared clipboard
Via the shared clipboard functionality the clipboard of the guest OS can be shared with that of your host. Enter the Shared Clipboard menu item by opening the Devices menu of the virtual machine. Then select the mode according your needs, recommendation is Bidirectional because this will always make sure that both clipboards contain the same data. Further information can be found in the VirtualBox manual.
Setting up drag and drop
Oracle VM VirtualBox enables you to drag and drop content from the host to the guest, and vice versa. Enter the Drag and Drop menu item by opening the Devices menu of the virtual machine. Then select the mode according your needs, recommendation is Bidirectional because this enables drag and drop operations in both directions. Further information e.g. known limitations can be found in the VirtualBox manual.
Adjusting virtual machine window size
Once the guest additions are installed, the window size can be changed. Select the option Adjust Window Size. Then resize the window to make it appear as a normal working size.
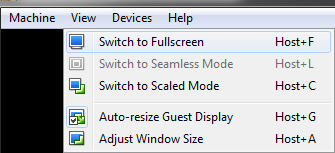
Put the virtual machine in Fullscreen mode
You can switch the display of the SDK to fullscreen mode by selecting View in the VirtualBox menu and choosing Switch to Fullscreen.
You can still access the most important options of VirtualBox in the menu that appears at the bottom of the screen when you get close to it with your cursor.
Uninstall the virtual machine
To uninstall the virtual machine, open VirtualBox and right click the machine you want to remove. Chose Remove from the menu.
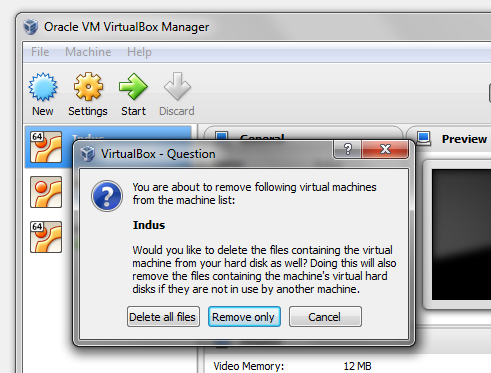
In the following dialog you can decide if you want to remove the virtual machine from VirtualBox or if you want to delete the files containing the virtual machine from your hard drive as well. This will remove the hard drive of the virtual machine and all files saved there. Please make sure to make backups of the files you still need before deleting all files. Remove only will just delete the virtual machine from VirtualBox but leave the files containing the virtual machine intact.
Non-SDK images
We recommend running minimal, target and development images on
real hardware, but VirtualBox
can run our amd64 images.
-
Download the
.img.gzand.img.bmapfiles for the image you need from the image repository -
Expand the downloaded
.img.gzfile:-
If you have
bmaptool(recommended), use that to create a sparse file:$ bmaptool copy filename.img.gz apertis.img -
If not, expand the downloaded
.img.gzfile (this will be slower):$ gunzip -c filename.img.gz > apertis.img
-
-
Convert the image to VirtualBox format:
$ vboxmanage convertfromraw apertis.img apertis.vdi --format VDI -
You can delete the temporary
.imgfile now -
Create a new VM in the VirtualBox Manager
- Select
Use an existing virtual hard disk fileand chose the.vdifile - Modify Settings, mostly the same as for the SDK (see above)
Base Memorycan be smaller for these images: 1024M is recommended
- Select